The instrument below learned from one sound only: a magnetic resonator piano, whose strings are set ringing by magnets, so its notes swell and sustain instead of being struck. Feed it a long, held hum, then tap a quick rhythm on the desk, and listen to what comes back each time.
Feed it a long hum, then a quick tapped rhythm. Which one does the piano make sense of, and what does that tell you about its recordings?
What did it learn to answer?
LiveTransfer
Live style transfer from catalog models.
- Amount 1.00
The model downloads into your browser first, about 125 MB. The hum works because the recordings were full of sustained tone; the taps blur because there was almost nothing like them to learn from. What you recorded decides where the instrument works.
Now imagine the same thing trained on a sound from your own life: your cello, your grandmother's harmonium, your own voice, the clatter of your kitchen. You'd play it with anything, a hum, a guitar, a drum loop, and it would answer in that sound. That's this project. You'll choose a source, record a collection of it, prepare it, train a model on it, then play it and find where it sings and where it breaks.
It's the most demanding project in this series. Training takes real time and computing power, and the result is rarely what you imagined on the first try. It's also the one where the instrument is most completely yours. Before you record anything: if you train a model on an hour of your cello and then sing into it, what do you think decides whether the result sounds like your cello?
From recordings to an instrument
Stage 1: Choose a source with character
The best sources for a personal model have a strong, recognisable character and plenty of variety inside it. A cello has bowed notes, plucked notes, scrapes and harmonics. A voice has vowels, breath and every pitch you can sing. A box of found sounds (glass, metal, wood) has textures no synth makes. A sound with one flat character, like a single sine-like tone, gives the model little to learn and you little to play.
Pick something you can record for an hour or more, in one place, over a few sessions. That rules out a sound you only have for an afternoon.
Then the question that matters most: is it yours to use? Your own voice and your own instrument are. Someone else's playing, someone else's voice, or a recording from a record or a sample library usually isn't, unless they agree. A voice model is a particularly personal thing to make of someone, so ask clearly and get it in writing. Voices, cloning and consent covers what to ask and why it matters.
Checkpoint: one source, chosen, that you're allowed to train on and can record a lot of.
Stage 2: Record everything it can do
The model can only answer in sounds it was shown, so your recording plan is your instrument design. Training on your own sounds explains how much, how varied and how clean a training set needs to be; this stage turns that into a list. Plan what to cover before you press record:
What will you record, across which range, at which loudness and in which playing styles, and for how long?
Dataset plan
0 of 6 done · saved in this browser
Aim for at least an hour of material; models like these are usually trained on a few hours. Cover the whole pitch range, soft to loud, and every way of playing you'll want later. Play musically, too, not only scales: phrases teach the model how your sound moves from one note to the next. Keep the setup the same for every session, same mic, same position, same room, because anything that's always in your recordings becomes part of the instrument.
Checkpoint: an hour or more of recordings that cover your plan, with notes on what each file contains. Planning and recording samples covers mic position, level and room in detail.
Stage 3: Clean it up and hold some back
Listen through everything once. Remove the takes you'd never want the instrument to sound like: the clipped ones, the coughs, the phone buzz, the long stretches of silence. A model learns from silence and mistakes as faithfully as from your best playing.
Then prepare the files the way your trainer asks, usually:
- One format. Mono files at the sample rate the trainer expects, often 44.1 or 48 kHz.
- Even level. Bring sessions to a similar level so one loud day doesn't dominate. Keep the difference between soft and loud playing inside each file; that's information the model needs.
- A held-back set. Put aside a few minutes the model never trains on. You'll use them in Stage 4 to know when to stop.
This stage is called preprocessing. It's tedious, and it matters more than any training setting. Our take: an hour spent removing bad recordings improves the instrument more than an extra day of training.
Checkpoint: a clean folder of training files, a small held-back folder, and a note of what you removed and why.
Stage 4: Train it
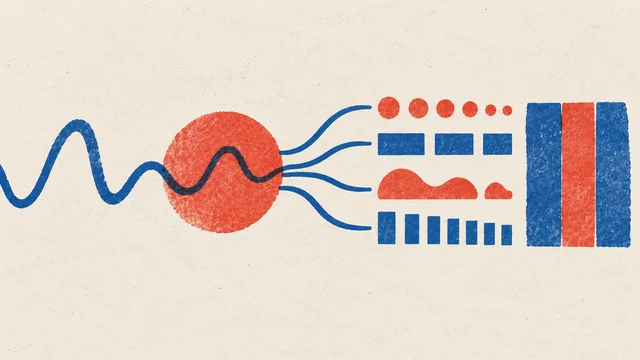
Now the computer does the work. A timbre model like the piano one above learns two things at once: how to describe a slice of sound as a short list of numbers (the encoder), and how to turn such a list back into sound (the decoder). It learns by trying to rebuild your recordings, measuring how far off it was, and adjusting itself, millions of times. Neural instruments explains how the encoder and decoder work together when you play.
Be realistic about what that takes. Training a model like this from scratch usually needs a powerful graphics card running for days. You have three routes:
- An open-source trainer on your own computer, such as the training code for RAVE, the model family behind LiveTransfer, if it has a strong graphics card. Expect to follow command-line instructions.
- The same trainer on a rented graphics card from a cloud provider, paid by the hour. Check the cost of a few days before you start.
- A hosted service that trains a model for you from uploaded recordings. It's the easiest, but your recordings leave your computer; read what the service may do with them.
Some tools also offer fine-tuning a model someone else trained, which can take far less time and data; Training on your own sounds compares the routes. Maru doesn't train models for you today; a faster fine-tuning route for personal instruments is something we're exploring.
Two checks before you start. Read the licence of the trainer, not only of your data: some research trainers, RAVE's among them, are shared for non-commercial use only, and that can apply to what you make with them. And save the exact version and settings you train with, so you can train again later.
While it trains, the trainer reports how far off its rebuilds are, often called the loss. Watch the loss on your held-back files, not only on the training files. When the held-back loss stops falling, keep that checkpoint: training on past that point leads to overfitting, a model that plays back its training files instead of following you. Training on your own sounds shows the curve and what overfitting sounds like.
Checkpoint: a trained model file, saved with the trainer version, settings and dataset notes.
Stage 5: Play it with your performance
A trained model is an instrument only once you play it. Most open-source trainers export a file their own real-time player or plugin can run: sound goes in, your instrument's sound comes out. Use your trainer's player for your own model. Maru's LiveTransfer is a place to practise with its existing collection, like the piano model above; it can't yet load a model you trained.
Start with your own source itself as input, a phrase on the cello into the cello model. It should sound close to the original, a little smoothed. If it doesn't, the problem is in the dataset or the training, not in your input. Then feed in a slow, sung phrase, turn the blend all the way to the model and back down, and listen for what survived: the rhythm, the rise and fall, the attacks. Neural instruments covers that listening, and the short delay these models add, in detail.
Checkpoint: your model playing back a phrase you sang or played, and a sense of how much delay you'll need to play around.
Stage 6: Find its musical edges
Now go looking for where it breaks, on purpose. The edges are where a personal model gets interesting, and your dataset plan tells you where to look.
What the model was shown
Try one change at a time:
- Below and above your recorded range. The pitch may drift toward the range the model knows, or the sound turns to mush. You'll hear exactly where your dataset ended.
- A sound unlike your source. You heard this at the top of the page: hits into a model of sustained notes blur into texture. Sometimes that's beautiful.
- Your source's own playing styles. A plucked note into a model that heard mostly bowing tells you whether the plucks were in the dataset.
- The offsets. If your player has controls that nudge the model's internal description, like LiveTransfer's Z sliders, move one slowly until your phrase starts to dissolve, then back off.
Write down what each test did. The places where the result is clearly your instrument's character and still clearly your phrase are your sweet spots. The places where it breaks tell you what to record next time, and they're rarely random: the failures follow the gaps in what you recorded.
Checkpoint: a list of inputs that work, inputs that break it, and what's missing from the dataset.
Stage 7: Save the setting that sings
Pick your favourite sweet spot and save it as a preset in your player, named after the input that makes it work: "hummed low lines", "slow guitar swells". With a model like this, the input is half the preset.
Keep everything together in one folder: the dataset notes, the held-back files, the model file with its trainer version and settings, your list of edges, and a short recording of the sweet spot. If you add recordings later to fill the gaps you found, you'll train a better second version and be able to hear exactly what changed. If you used a model from someone else's collection along the way, like the piano one here, check its licence before releasing anything made with it; LiveTransfer's models, shared by the Intelligent Instruments Lab, are for non-commercial use.
You could also play your model in other ways: Terrain RAVE plays a trained model by moving across a map instead of feeding it an input. But the heart of this project is the one you've done: you decided what the instrument knows, by deciding what to record.
Checkpoint: a saved setting, a short recording of it, and a folder that lets you train version two.
Same idea, different place: guitarists do this with amps and pedals. They record a test signal going in and the amp's sound coming out, and a model learns to behave like that amp. Same lesson: it only knows the playing it was shown. Neural amps and captured gear shows how.
Quick check
- You play your own cello into your new cello model, and it comes back sounding nothing like your cello. Where do you look first? In the dataset and the training, not your playing. The model's own source is the easiest input it will ever get. Listen back through the training files for a problem that runs through all of them (level, noise, a wrong sample rate), and check whether the held-back loss ever fell.
- You've recorded forty minutes and you're keen to start training. What's worth doing before you press go? Check the recordings against your plan: which pitches, dynamics and playing styles are missing, and is there a held-back set? An extra session to fill the gaps costs an afternoon; finding them after days of training costs a whole run.
- Every sound your model makes has a faint hum underneath. Where did it come from? From the recordings. Anything that was always there, a fridge, a lamp, a room's echo, is part of what the model learned your instrument sounds like. Clean it out of the dataset, or record somewhere quieter, and train again.
Next steps
- Go deeper: What an audio model learns. Your model broke exactly where your recordings ran out. Why do models fail in such predictable directions?
- Sideways: A first sampled instrument. The same wish with no training at all: a dozen recordings of your sound, mapped to keys, playable tonight.